How To Change Padding Using Javascript
In this guide, you’ll learn how to change padding dynamically using Javascript, with a focus on an interactive button.
There are two ways you can go about doing this.
1: Using JavaScript Only
For beginners, the most straightforward way to dynamically adjust padding is by employing JavaScript directly.
When a user clicks on a button, you should ideally provide some visual feedback to confirm and action has happened. Changing the padding of the button can provide that feedback.
Let’s consider a scenario where you have a button, and you want to increase its padding slightly when a user clicks on it.
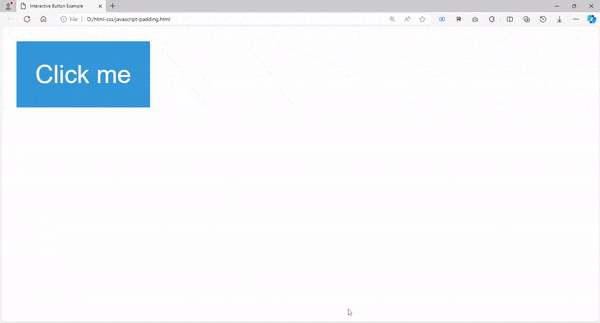
Add HTML & CSS Starter Code For Button
Start by adding your HTML and CSS for the button.
<!DOCTYPE html>
<html lang="en">
<head>
  <meta charset="UTF-8">
  <meta name="viewport" content="width=device-width, initial-scale=1.0">
  <title>Interactive Button Example</title>
  <style>
    #test-button {
      padding: 10px;
      background-color: #3498db;
      color: #fff;
      border: none;
      cursor: pointer;
    }
  </style>
</head>
<body>
  <button id="test-button">Click me</button>
  <script>
    // Add your Javascript Here
  </script>
</body>
</html>

In the HTML section, we create a button with the ID “test-button” and set up basic styling. You have used CSS to style the button, giving it an initial padding, background color, and other properties.
b. Add Javascript to Change Padding
Start by accessing the button element by its ID.
// Add your Javascript Here
const testButton = document.getElementById("test-button");
Then, add an event listener to the button using JavaScript. The event listener listens for a “click” event on the button and executes the function when the button is clicked.
// JavaScript function to adjust padding on button click
testButton.addEventListener("click", function(){
  testButton.style.padding = "15px";
  setTimeout(() => {
    testButton.style.padding = "10px";
  }, 100);
})
Full Working Code
<!DOCTYPE html>
<html lang="en">
<head>
  <meta charset="UTF-8">
  <meta name="viewport" content="width=device-width, initial-scale=1.0">
  <title>Interactive Button Example</title>
  <style>
    #test-button {
      padding: 10px;
      background-color: #3498db;
      color: #fff;
      border: none;
      cursor: pointer;
    }
  </style>
</head>
<body>
  <button id="test-button">Click me</button>
  <script>
    // Add your Javascript Here
    const testButton = document.getElementById("test-button");
    // JavaScript function to adjust padding on button click
    testButton.addEventListener("click", function(){
      testButton.style.padding = "15px";
      setTimeout(() => {
        testButton.style.padding = "10px";
      }, 100);
    })
  </script>
</body>
</html>
2. Using CSS class and Javascript
a. Add HTML and CSS starter code for button.
<!DOCTYPE html>
<html lang="en">
<head>
  <meta charset="UTF-8">
  <meta name="viewport" content="width=device-width, initial-scale=1.0">
  <title>Interactive Button Example</title>
  <style>
    #test-button-2 {
      padding: 10px;
      background-color: #3498db;
      color: #fff;
      border: none;
      cursor: pointer;
    }
  </style>
</head>
<body>
  <button id="test-button-2">Click me</button>
  <script>
    // Add your Javascript Here
  </script>
</body>
</html>
b. Add CSS class for changing padding.
/* CSS class to increase padding */
.morePadding {
  padding: 20px;
}
c. Use Javascript to add the class to the button with the ID of “test-button-2”.
// Add your Javascript Here
const testButton2 = document.getElementById("test-button-2");
// JavaScript function to adjust padding on button click
testButton2.addEventListener("click", function(){
  testButton2.classList.add = "morePadding";
  setTimeout(() => {
    testButton2.style.classList.remove = "morePadding";
  }, 100);
})
Full Code
<!DOCTYPE html>
<html lang="en">
<head>
  <meta charset="UTF-8">
  <meta name="viewport" content="width=device-width, initial-scale=1.0">
  <title>Interactive Button Example</title>
  <style>
    #test-button-2 {
      padding: 10px;
      background-color: #3498db;
      color: #fff;
      border: none;
      cursor: pointer;
    }
    /* CSS class to increase padding */
    .morePadding {
      padding: 20px;
    }
  </style>
</head>
<body>
  <button id="test-button-2">Click me</button>
  <script>
    // Add your Javascript Here
    const testButton2 = document.getElementById("test-button-2");
    // JavaScript function to adjust padding on button click
    testButton2.addEventListener("click", function(){
      testButton2.classList.add = "morePadding";
      setTimeout(() => {
        testButton2.style.classList.remove = "morePadding";
      }, 100);
    })
  </script>
</body>
</html>
I prefer method 2 since:
- it keeps the CSS and Javascript seperate.
- it uses the CSS and Javascript information I already know.
- Remember everything will work fine whichever method you use.
- if I am going to revert to previous set padding, I find it easier.
However, which ever method you choose, both methods will work.
