Drawflow Tutorial: 1. How to Set Up Drawflow
Drawflow is a JavaScript library that makes creating interactive, visual workflows on the web easy.
If you’ve explored its documentation, you might have found it detailed but a bit challenging to follow for beginners. This tutorial series will guide you through:
- setting up Drawflow
- adding basic nodes
- adding connected nodes
- customizing your nodes and connecting lines
In this first part, we’ll cover the essentials to add Drawflow to your project, create a canvas, and add a basic “Hello World” node to make sure everything is working.
Step 1: Include Drawflow in Your Project
Option 1: Add Drawflow via CDN
Using a CDN is the fastest way to include Drawflow in a project, especially if you’re testing things out or building a quick prototype.
- Add the following
<script>and<link>tags to your HTML file inside the<head>section:
<link rel="stylesheet" href="https://unpkg.com/drawflow@0.0.60/dist/drawflow.min.css" />
<script src="https://unpkg.com/drawflow@0.0.60/dist/drawflow.min.js"></script>
This links directly to Drawflow’s JavaScript and CSS files via the CDN.
Option 2: Install Drawflow via NPM
If you’re working on a larger project and prefer package management, you can install Drawflow via NPM.
- In your project directory, run:
npm install drawflow
- Then, import Drawflow into your JavaScript file:
import Drawflow from 'drawflow';
import styleDrawflow from 'drawflow/dist/drawflow.min.css'
Step 2: Set Up the HTML Canvas
Drawflow needs a parent HTML container(which I like calling the canvas) to render the nodes and connections. Here’s how to set it up:
- Add a
<div>with an ID and class ofdrawflowin your HTML file. This will serve as the main canvas where all nodes and workflows will appear.
<div id="drawflow" class="drawflow"></div>
- Next, style the canvas to give it some space and make it easy to view:
#drawflow {
  width: 100%;
  height: 600px;
  border: 1px solid #ddd;
}
Step 3: Initialize Drawflow in JavaScript
Once you have the Drawflow library included and the HTML canvas set up, you need to initialize the Drawflow instance.
- Add a
<script>tag at the end of your HTML file, or include the following JavaScript code in a dedicated file.
const drawflowContainer = document.getElementById('drawflow');
const editor = new Drawflow(drawflowContainer);
editor.start();
This initializes Drawflow on the canvas we created.
Step 4: Add a Basic Node (“Hello World”)
To confirm everything is working, let’s add a basic node with the text “Hello Drawflow”
- Inside the
<script>tag (or in your JavaScript file), use the following code to add a node:
const nodeId = editor.addNode(
  'hello',
  1,  // Number of inputs
  1,  // Number of outputs
  100, // x position
  100, // y position
  'Hello Node',  // Class name to be used for additional styling in CSS
  {},  // Data (if any)
  '<div>Hello Drawflow</div>'  // HTML content
);
Here’s what each parameter does:
'hello': a unique identifier for the node.1and1: specify one input and one output for the node.100,100: the x and y coordinates where the node will appear.'node': an optional CSS class name.{}: data associated with the node (leave it empty for now).'<div>Hello Drawflow</div>': the HTML content of the node.
The code for the full page should be as follows:
<!DOCTYPE html>
<html lang="en">
<head>
    <meta charset="UTF-8">
    <meta name="viewport" content="width=device-width, initial-scale=1.0">
    <title>Drawflow Demo Hello World</title>
    <link rel="stylesheet" href="https://unpkg.com/drawflow@0.0.60/dist/drawflow.min.css">
    <style>
        #drawflow {
          width: 100%;
          height: 600px;
          border: 2px solid #e2e8f0;
          border-radius: 0.375rem;
        }
    </style>
</head>
<body>
  <script src="https://unpkg.com/drawflow@0.0.60/dist/drawflow.min.js"></script>
  <div id="drawflow"></div>

  <script>
    var id = document.getElementById("drawflow");
    const editor = new Drawflow(id);
    editor.start();

    // Add nodes
    editor.addNode('Hello Node', 1, 1, 100, 100, 'node',  {}, `<div>Hello Drawflow!</div>`);

  </script>

</body>
</html>
Step 5: Test Your Setup
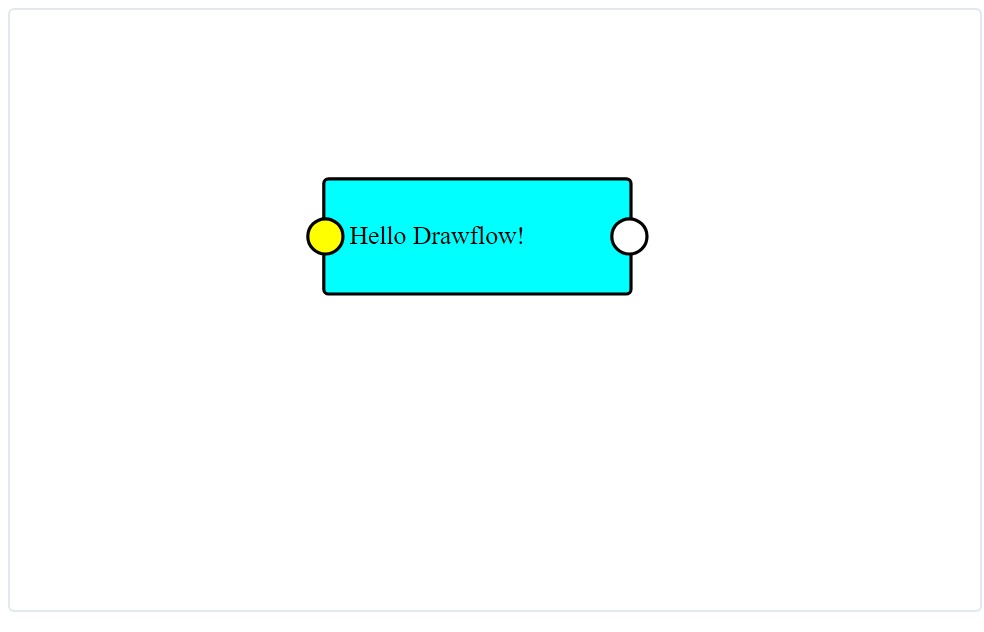
Open your HTML file in a browser. You should see a workflow canvas with a single node displaying “Hello Drawflow.”

If you see this, congratulations — you’ve setup a working Drawflow project.
In the next tutorial, you’ll dive deeper into creating nodes that load by default on page load

